


Chewbacca Mask Foam Templates and Hairing
Chewbacca Mask Foam Templates and Hairing
Couldn't load pickup availability
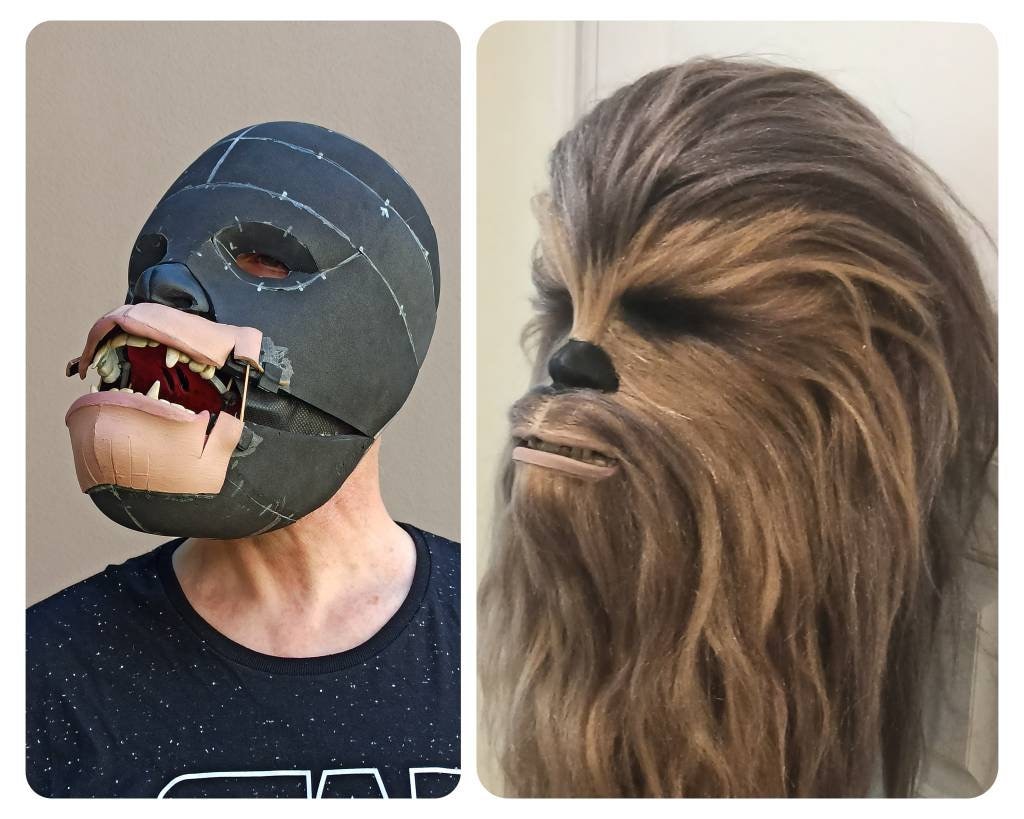
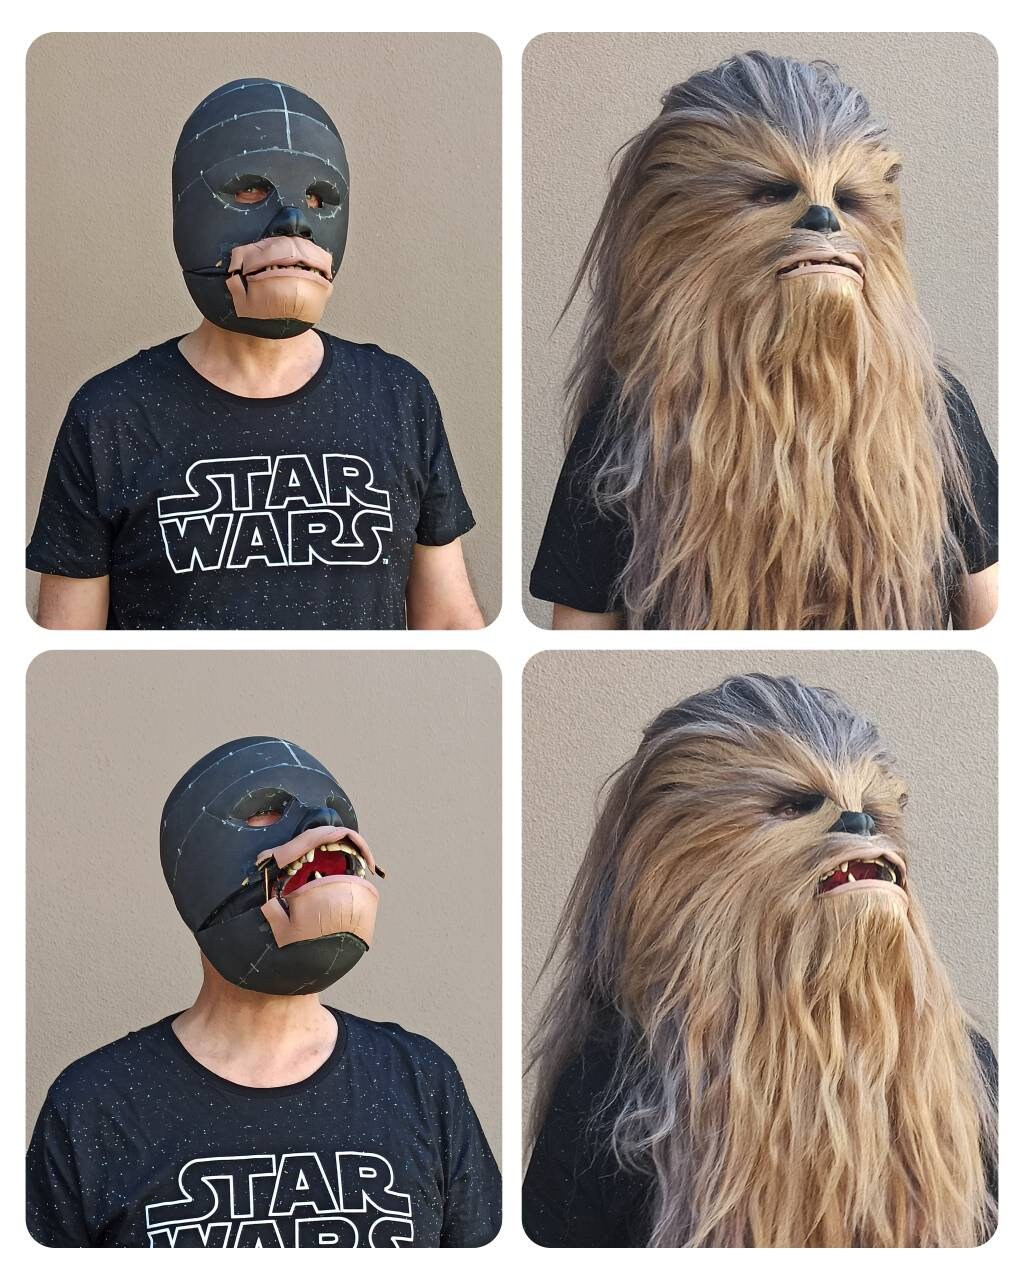
This digital template set includes guides for making a Chewbacca mask with EVA foam, along with instructions for adding the hair. Suitable for both adults and kids.
Be sure to follow the foam build video and the hairing video for the complete step-by-step process.
The templates are designed to cut 6–10 mm thick EVA foam (8 mm recommended) to build each part of the mask. This is an original design inspired by the Star Wars movies.
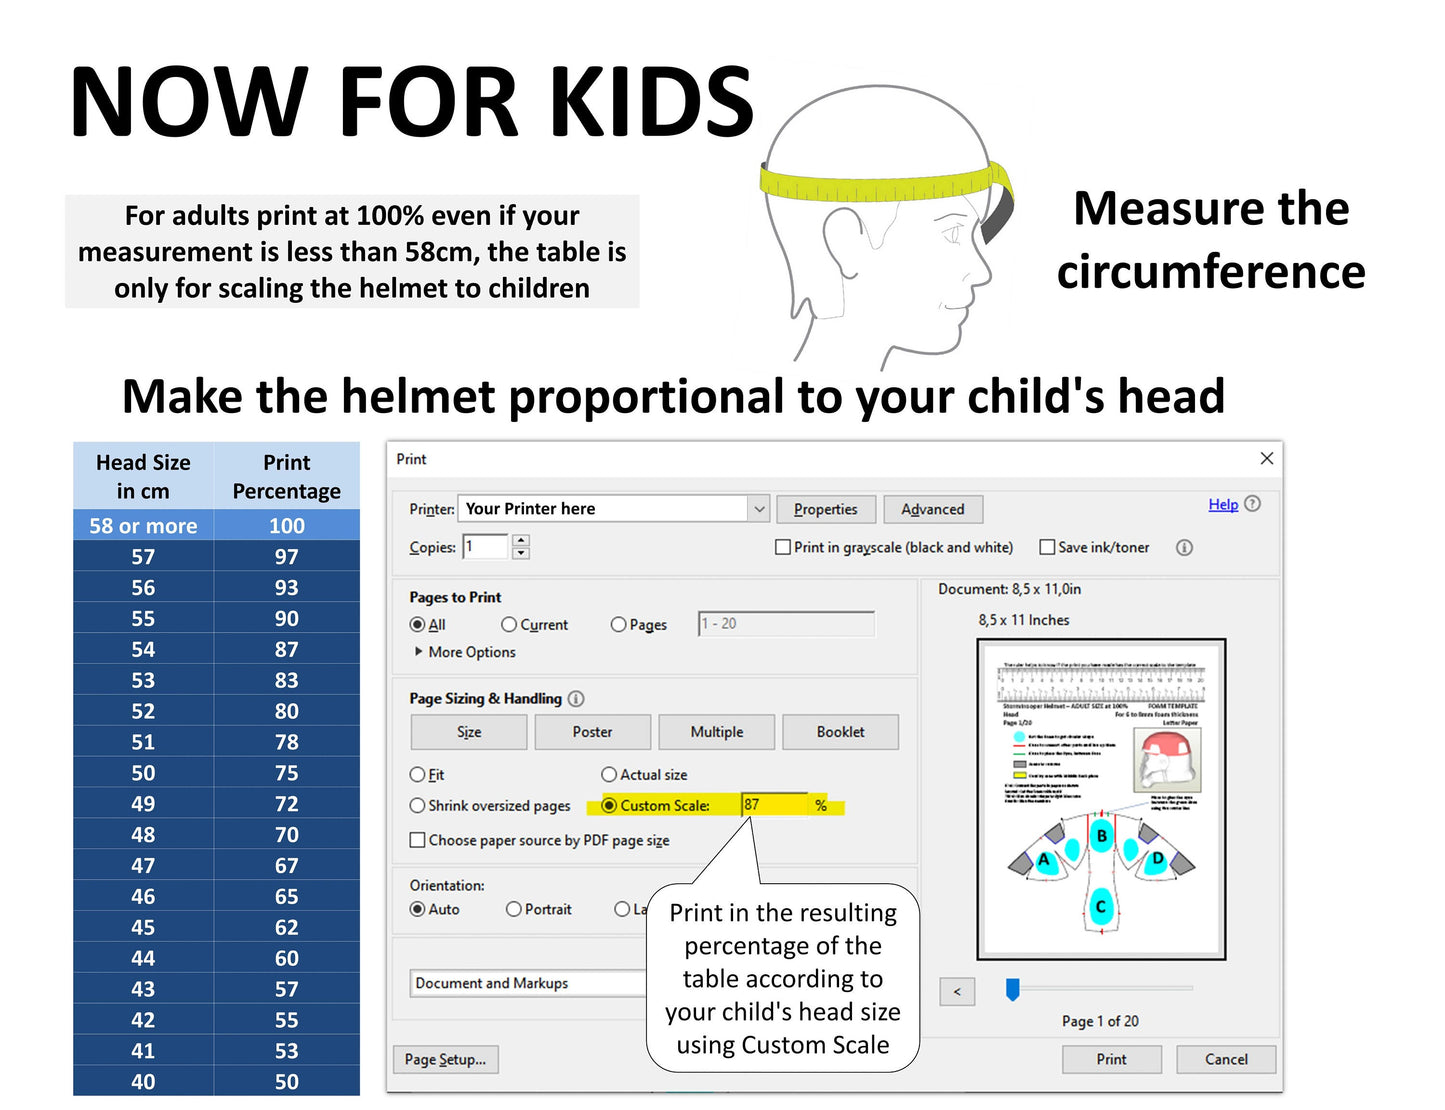
The templates are provided as PDF files formatted for Letter paper at 100% scale for adults. For other head sizes for kids, please check the scaling table to print at the appropriate percentage. Use Adobe Reader to open the files and select the correct paper size in the print settings. If you are printing on A4, choose the “Actual Size” option in Adobe Acrobat so the pages print at the intended scale.
Before printing the full set, check the print scale with a ruler on the first page to ensure the size is correct.
At the end of this document, you will also find a list of required materials and additional details for building the mask.
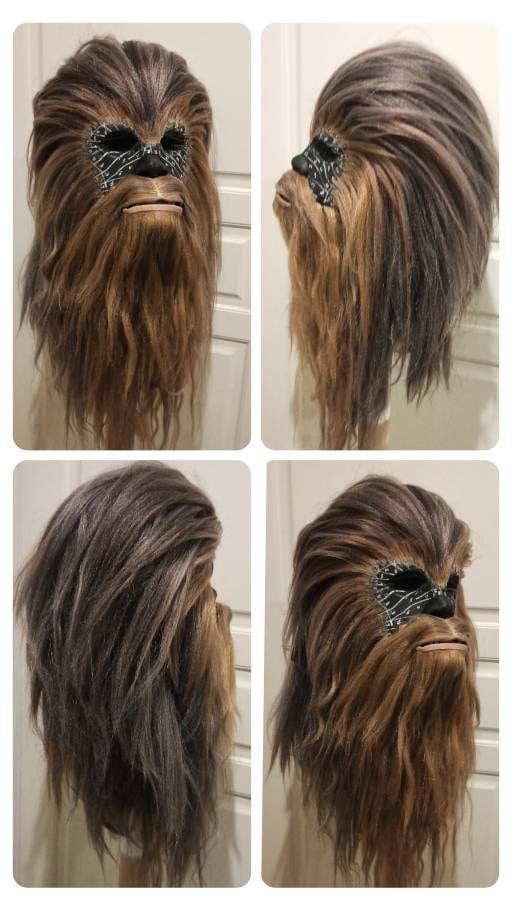
You can see the final quality of the mask in this example from a customer who sells the finished product made using this template:
https://www.etsy.com/listing/1872719969/chewbacca-mask-realistic-cosplay
Templates include all helmet with these parts:
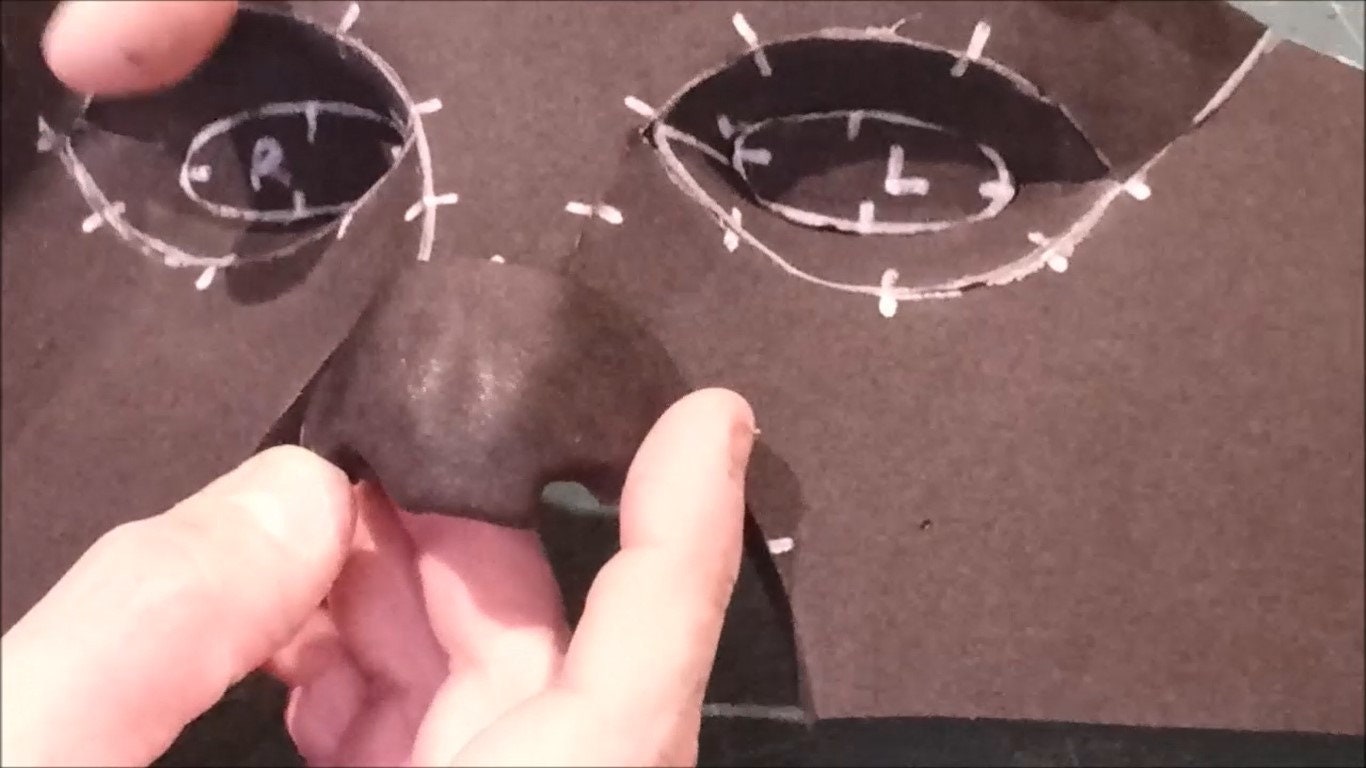
FOAM:
Head
Face
Nose (foam or 3D print options)
Chin
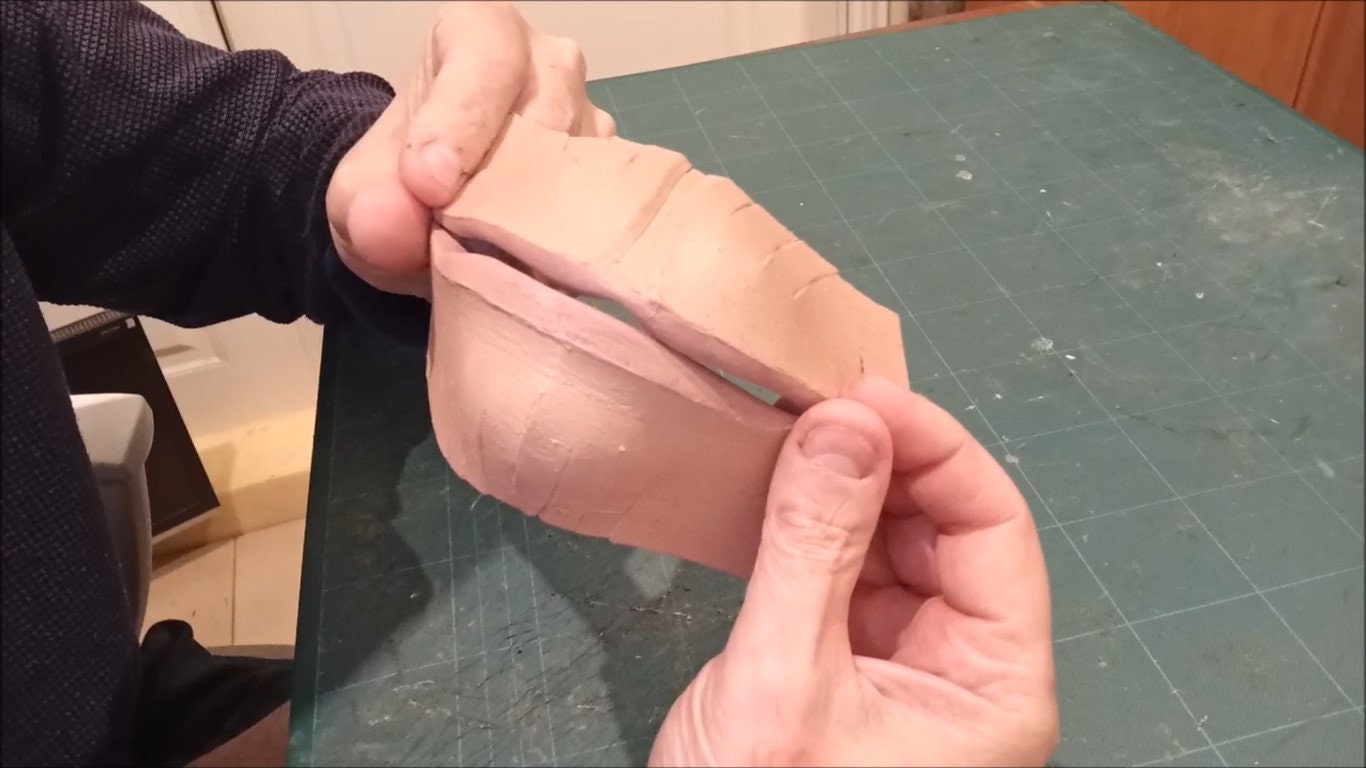
Tongue
Mouth (3D print)
Lip Mechanism (Optional, 3D print)
Pads and Strips
Back Cover
Adding Voice (Optional)
Goggles of Vandor Heist (3D print optional)
Recommendations (read first)
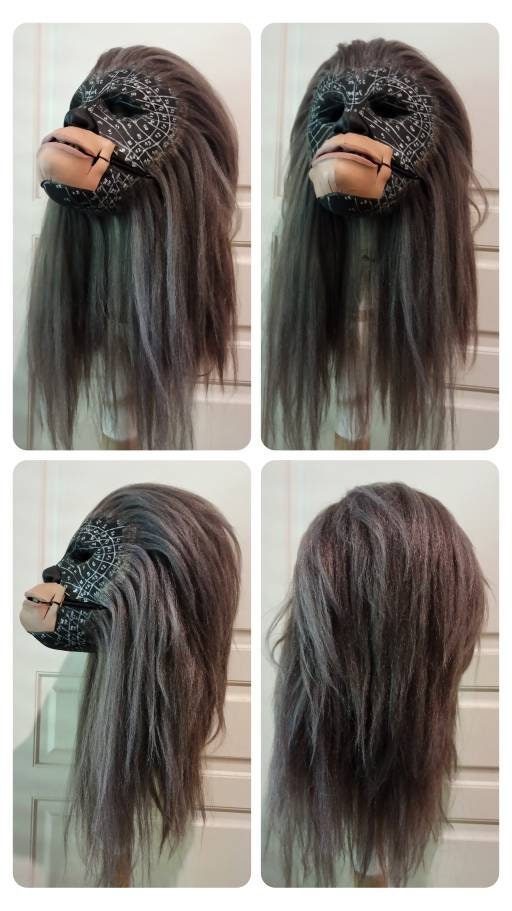
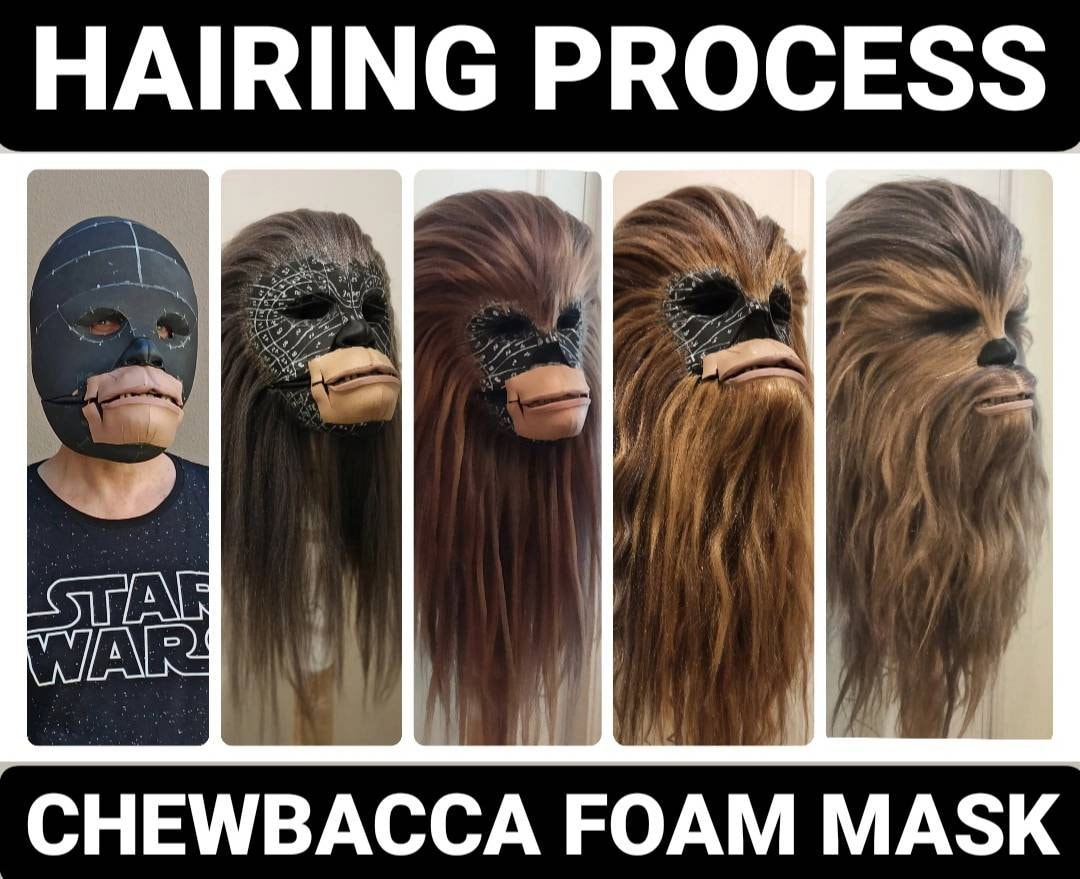
HAIRING:
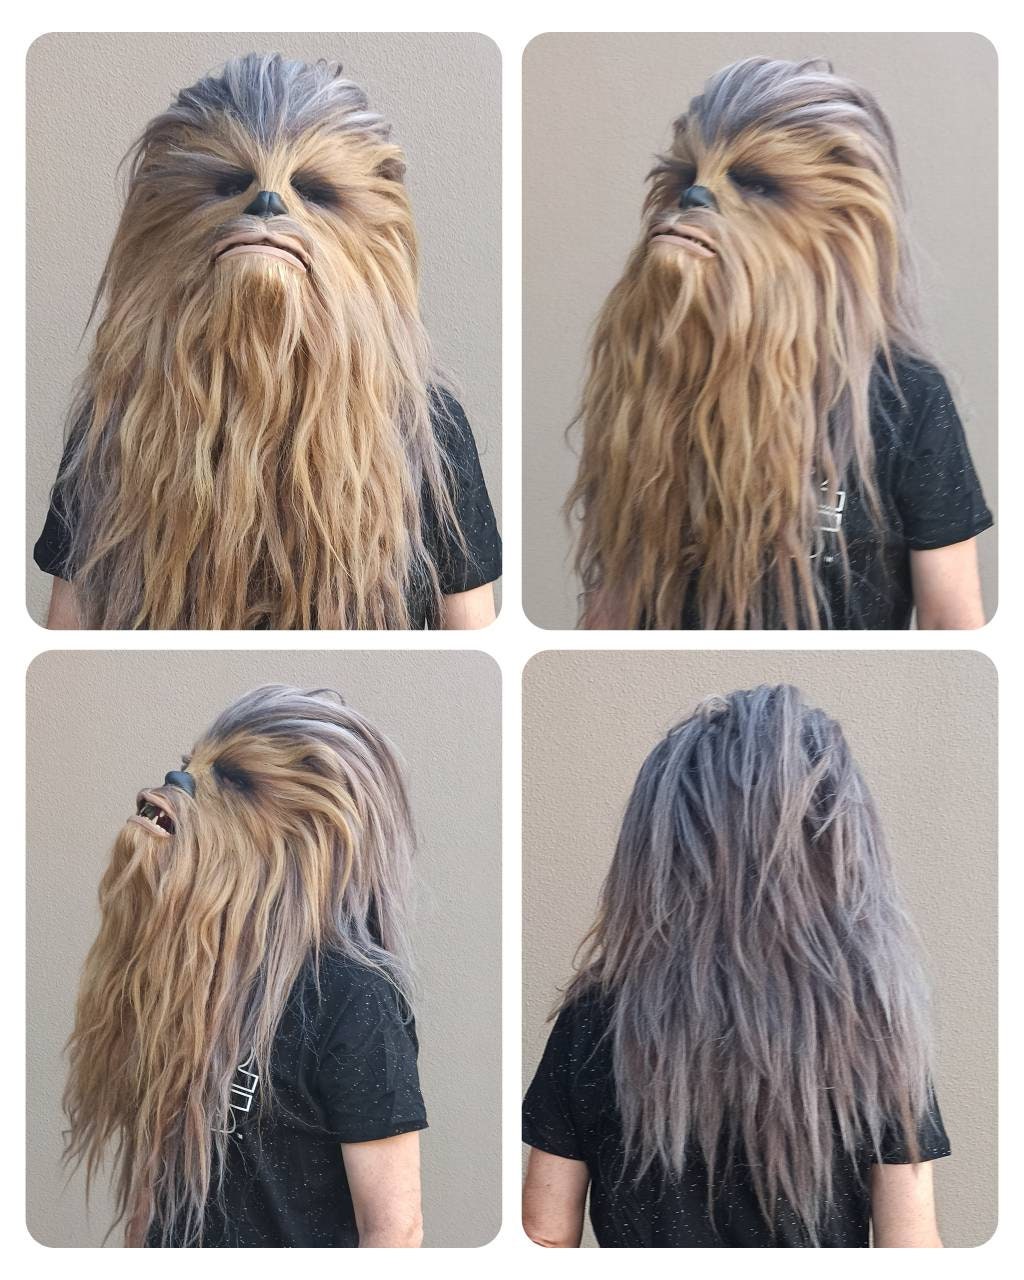
Templates for hair direction and length
Instructions on how to blend the hair
3D PARTS (STL format):
Dental parts with or without Lip Mechanism
Nose (can make it with foam)
Sound Adapter (Optional)
Goggles of Vandor Heist (3D print optional)
Foam build and Hairing video:
https://youtu.be/ylfiLtqelOQ
What we need for Chewbacca mask:
https://youtu.be/wgL8OZQFcg8
UPDATES, recommended:
Adjusting Face with Chin
https://youtu.be/N8owM54xO6c
Lip Mechanism & Joining Face with Chin
https://youtu.be/3CDDcE5T4Po
Mouth
https://youtu.be/vBXBTUzP2hs
Adding the mouth
https://youtu.be/JKxuvv7d6u8
Eyes Pad
https://youtu.be/mmEnjM4qcHQ
Straps
https://youtu.be/JKE1OABJ-H0
Hair direction and Length (easier and accurate)
https://youtu.be/E6_GS7MsdmY
Also I recommend do not do transition area, just jump from gray to blonde directly.
For this template, you will need the following materials and tools:
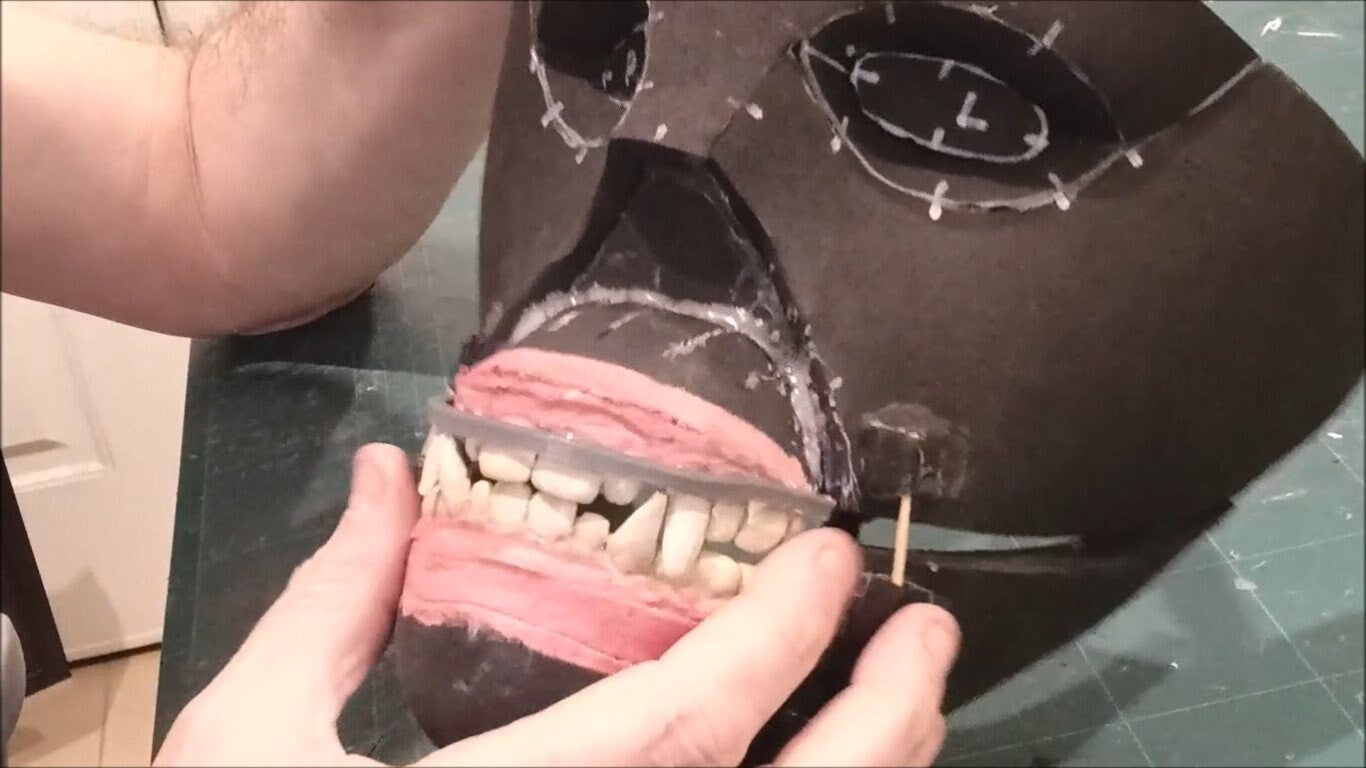
1. 3D-printed denture, which ensures a perfect bite and mouth alignment. I provide the STL files. I do not recommend building the mask without this piece unless you plan to keep the mouth permanently closed for a display mannequin. You can use a local 3D printing service if needed.
2. One square meter of 8 mm EVA foam for the entire mask, plus a marker to trace the templates onto the foam.
3. A small piece of 5 mm EVA foam for the eyes (you can also use 3 mm if you can't get it). This foam can also be used for the nose if you prefer making it with foam.
4. About half a square meter of 1 mm and 2 mm EVA foam for the mouth and the base of the tongue. This foam can also be used if you plan to make your own head straps.
5. Flexible paint for foam in skin color and red to paint the mouth and tongue. If you do not have flexible skin-tone paint, you can mix white paint with brown, pink, and red pigments to achieve a similar color.
6. Hot glue, used both to assemble the pieces and to reinforce the mask from the inside.
7. Flexible plastic to reinforce the chin area. You can use any thin flexible plastic, for example from an empty plastic paint can, cut vertically.
8. A hole punch to create holes in the plastic supports.
9. A 3D-printed nose, or alternatively you can build the nose using foam.
10. Fabric backpack straps and a 3D-printed buckle if you want to make adjustable foam straps to secure the mask to your head.
11. Elastic bands for the lip mechanism tension system (stronger bands are recommended for better durability over time).
12. Strong upholstery thread, also used for the lip mechanism.
13. Wood and 8 cm nails, plus a drill to make the holes. These are used to build a hackle tool that helps blend the hair (optional — you can also use a brush instead).
14. Black interfacing fabric (also called vlieseline) to cover the triangular side sections and the back cover, and to reinforce the head straps if you make them yourself.
15. Kanekalon hair in braids, recommended colors and quantities:
2 packs #4 (black)
2 packs #44 (grey)
2 packs #27 (blonde)
1 pack #8 (brown)
16. You will also need a brush and comb. Hairspray and a hair curler are optional for styling.
17. Basic tools: contact cement, paper tape, cutters, scissors, and a heat source or tool to shape the foam into curved forms.
Note: recommended foam density between 60 to 80 (30kg to 50kg in kg by m3) to get the same result.
Letter pages to print: 25
Important Notes:
· This product is a digital download only.
· No physical item will be shipped.
· Materials required to build the costume are not included.
· The files will be available for download after purchase.
Share